
7 Steps For Mastering the Art of Eyeshadow Application
Posted by Ellie Swain on Jun 5th 2025

Great eyeshadow can make all the difference between an everyday look and a show-stopper. But let’s face it, applying eyeshadow perfectly can feel like trying to master a complex art form.
Whether you’re a makeup novice or a seasoned beauty enthusiast, everyone can benefit from a few tips to elevate their eyeshadow game. With a bit of know-how and the right tools, you’ll turn heads with your eye makeup in no time. Keep reading for our top tips on applying eyeshadow.
1. Prep Your Canvas
Before you even think about reaching for your favorite palette, start by prepping your eyelids. Well-prepped eyelids ensure that your eyeshadow applies smoothly and lasts all day without creasing or fading.
Start by cleansing your face to remove any excess oils. Even a small amount of oil can cause your eyeshadow to slip and slide, making it impossible to achieve that flawless finish. After cleansing, apply a high-quality eye primer, like the multitasking Glo Skin Beauty Essential Eye Base.
Not only does a primer create a smooth base, but it also intensifies the color of your eyeshadow and locks it in place for hours. If you don’t have an eye primer on hand, a tiny dab of concealer or foundation can work. However, a dedicated primer will always give you the best results.
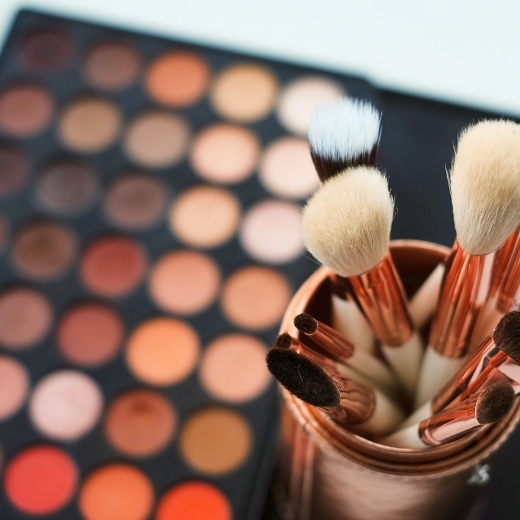
2. Choose Your Tools
When it comes to eyeshadow, the tools you use are just as important as the products themselves. While it might be tempting to rely on those little sponge applicators that come with some palettes, investing in a few quality brushes makes all the difference.
A good set of eyeshadow brushes doesn’t have to break the bank, but it will elevate your application from amateur to pro. A flat shader brush is perfect for packing color to your lids, while a fluffy blending brush will help you soften harsh lines and create that coveted gradient effect.
A smaller, more precise brush is ideal for detailing, like applying eyeshadow to your lower lash line or adding a pop of shimmer to your inner corners.
And don’t forget a good brow brush. Well-defined eyebrows frame your eyes, completing the look.
3. Perfect the Base
Once your eyelids are primed to perfection, it’s time to lay down the foundation for your eyeshadow. Start with a neutral base shade that complements your skin tone.
This base color will serve as the backdrop for the rest of your look, helping the other shades blend seamlessly. If you’re not sure where to start, the Jane Iredale PurePressed® Eye Shadow Triple offers some lovely shades.
Using your flat shader brush, sweep the base color across your entire eyelid, from lash line to brow bone. The key here is to apply the color evenly, ensuring that there are no patches where your skin shows through.
4. Create Depth with Transition Shades
Now that you have a solid base, it’s time to add some depth and dimension to your eyes. This is where your transition shade comes in.
A transition shade is typically a matte color that’s slightly darker than your natural skin tone. Its purpose is to create a gradient effect from your eyelid to your brow bone, making your eyes appear larger and more defined.
Using your fluffy blending brush, apply the transition shade to the crease of your eye, where your eyelid folds. Start with a small amount of product and gradually build it up. The trick is to use a light hand and blend, blend, blend.
5. Build Dimension with the Main Shade
With your transition shade in place, it’s time to add the main color to your look. This is the shade that will define your eyes and make them stand out.
The best part? You can get creative here. Whether you prefer a natural, earthy tone or something bold and vibrant, the choice is yours.
Pack the main shade onto your eyelid using your flat shader brush. Start at the center of your lid and work your way outwards, pressing the color into your skin rather than sweeping it.
6. Highlight and Define
No eyeshadow look is complete without a bit of highlighter. A shimmery or metallic shade can make your eyes stand out by adding a touch of light to the right places.
Using a small, precise brush, apply your highlight shade to the inner corners of your eyes and just beneath your brow bone. These areas naturally catch the light, and a hint of shimmer will enhance that effect, making your eyes look bright and awake.
If you’re feeling extra glamorous, you can also press a bit of the highlighter onto the center of your eyelid. This technique, known as “haloing,” creates a stunning, dimensional look that draws attention to your eyes.
7. Add the Finishing Touches
Your eyeshadow might be the star of the show, but the look isn’t complete until you’ve added those final touches. Line your eyes with a liquid or gel eyeliner for a sharp, defined look, or smudge a pencil liner for a softer, smokier effect. A few coats of mascara will add volume and length to your lashes, making your eyes appear larger and more open.
And don’t forget your brows. Fill in any sparse areas with a brow pencil or powder and set them in place with a clear or tinted brow gel.
Well-defined brows frame your face and draw attention to your eyes, making all the effort you put into your eyeshadow stand out.

Practice Makes Perfect
Like any art form, mastering eyeshadow application takes practice. Don’t be discouraged if your first few attempts aren’t perfect.
The more you experiment with different colors, techniques, and tools, the more confident you’ll become. And remember, wearing makeup is all about having fun and expressing yourself, so don’t be afraid to get creative and try something new.
Do you want more beauty advice? Here’s how to protect your hair from sun damage.